Using MPDX as a Minimalist
Step One: Delete Overdue Tasks
In MPDX, you can remove clutter by deleting all of your "Overdue" tasks to simplify what you see. Over time, when tasks are added and forgotten, or you've set task notifications that have gone ignored, your tasks can accumulate and overwhelm. If this is true for you, we recommend that you clear your "Overdue" task list and start fresh with something motivating and manageable.
To clear this list:
- Visit Tasks tab
- Choose the "Overdue" Tasks filter
- Click the topmost check box to "Select All."
- Go to the "Actions" dropdown
- Choose "Delete Tasks" from the dropdown menu.
- When prompted, click "Yes" for a blank Tasks page.

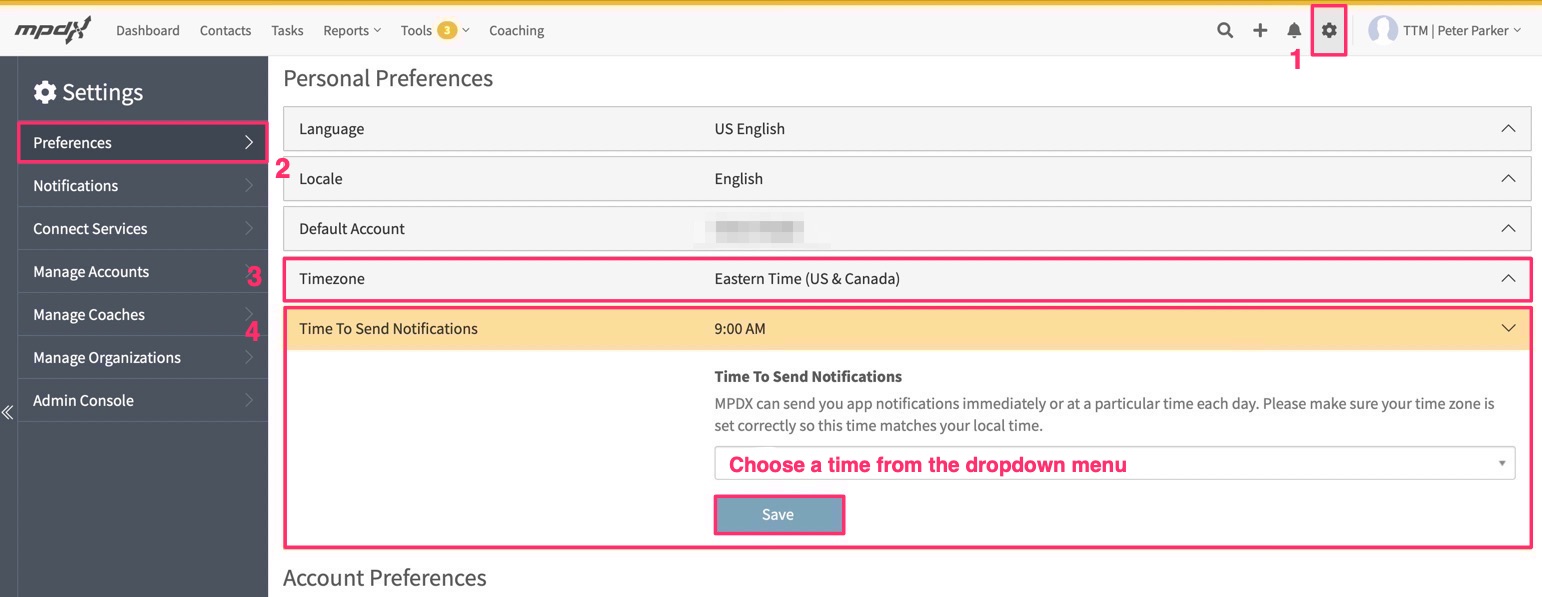
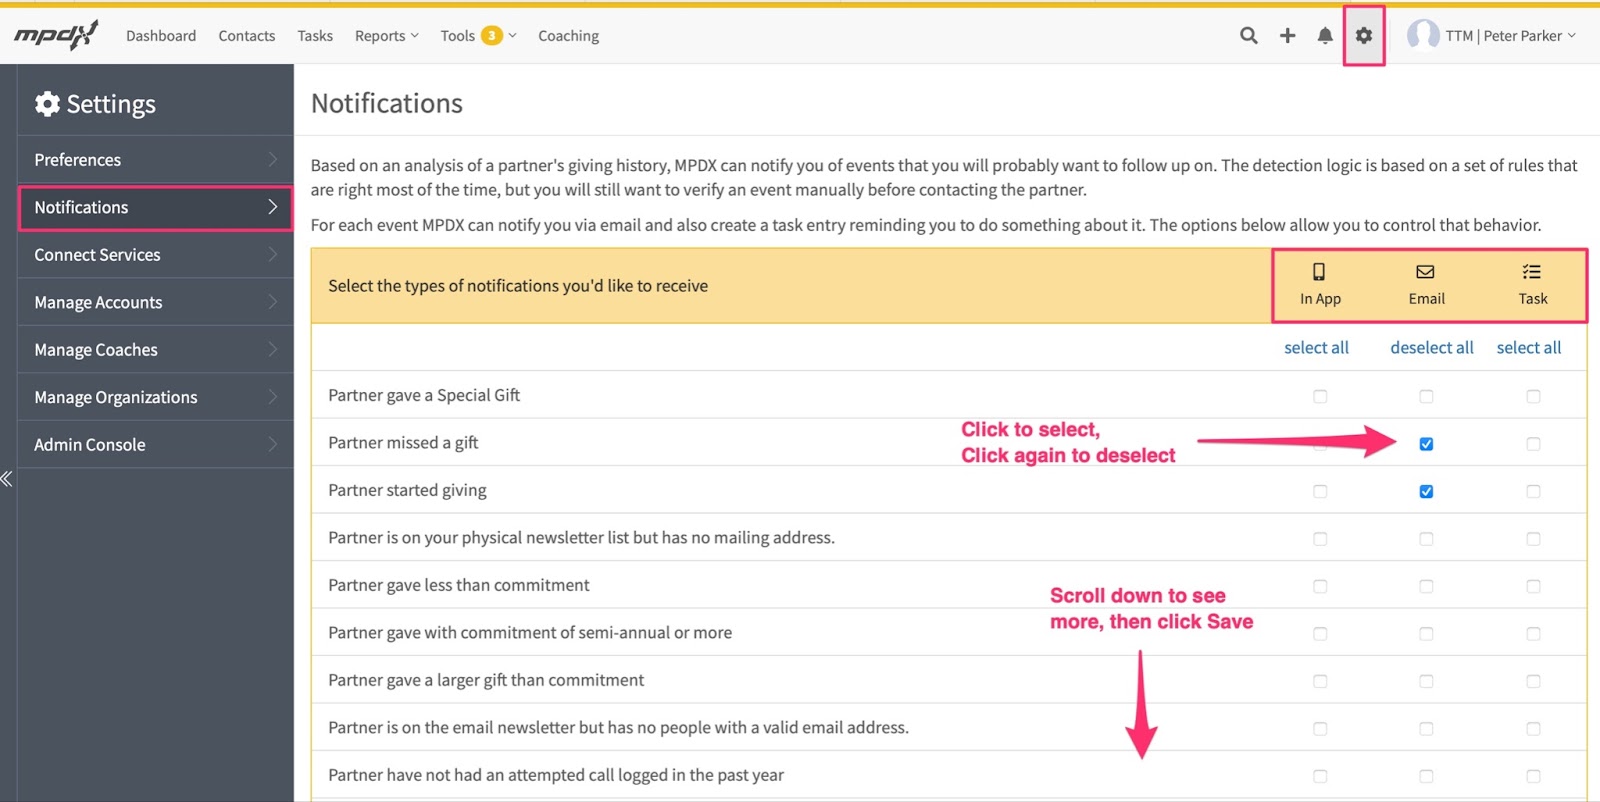
Step Two: Set Notification Preferences
To refocus your efforts and simplify what you see in the tool going forward, we recommend refreshing your Notifications. You know best what information you need to know, what time is best to see it, and where you prefer to receive the notifications you consider important.
In the tool, when you visit Settings, then Preferences, you can choose the Time Zone and Time To Send Notifications. Then, visit Notifications to select and deselect the notification types that are useful to you and choose where you would like to see them: In App, Tasks, or by Email. These settings can be changed at any time - just be sure to click "Save" before you exit the screen.
Step Three: Update Your Contacts’ Status
A contact’s “Status” explains where a contact is in the MPD process (i.e. Ask for Appointment, Call for Decision). There are several places you can set a status depending on whether you are working with a single contact, or with multiple contacts at one time.
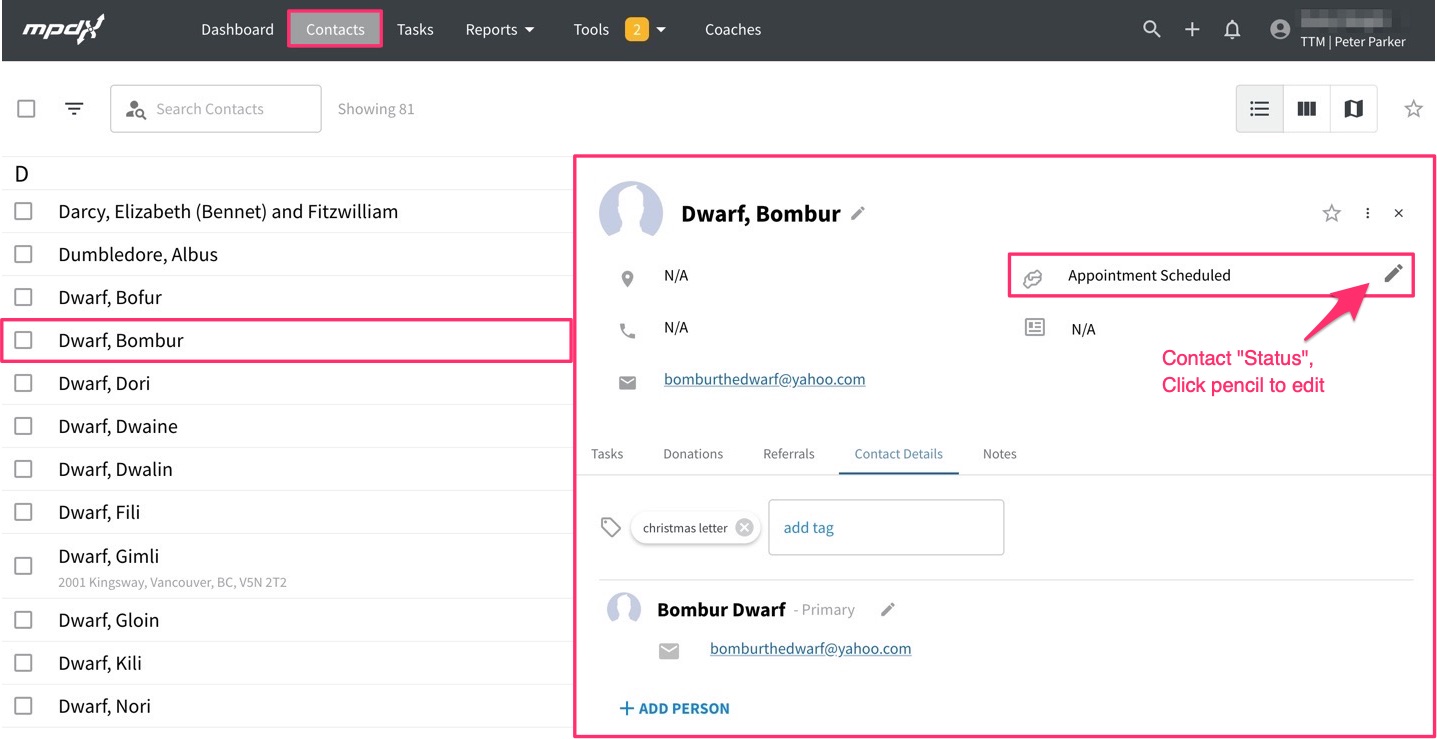
To set the Status for a single contact: Go to A Contact’s Page.
- In the top section, click the edit icon and make changes to the “Status” within the pop-up menu options. Choose a Status, then “Save.”
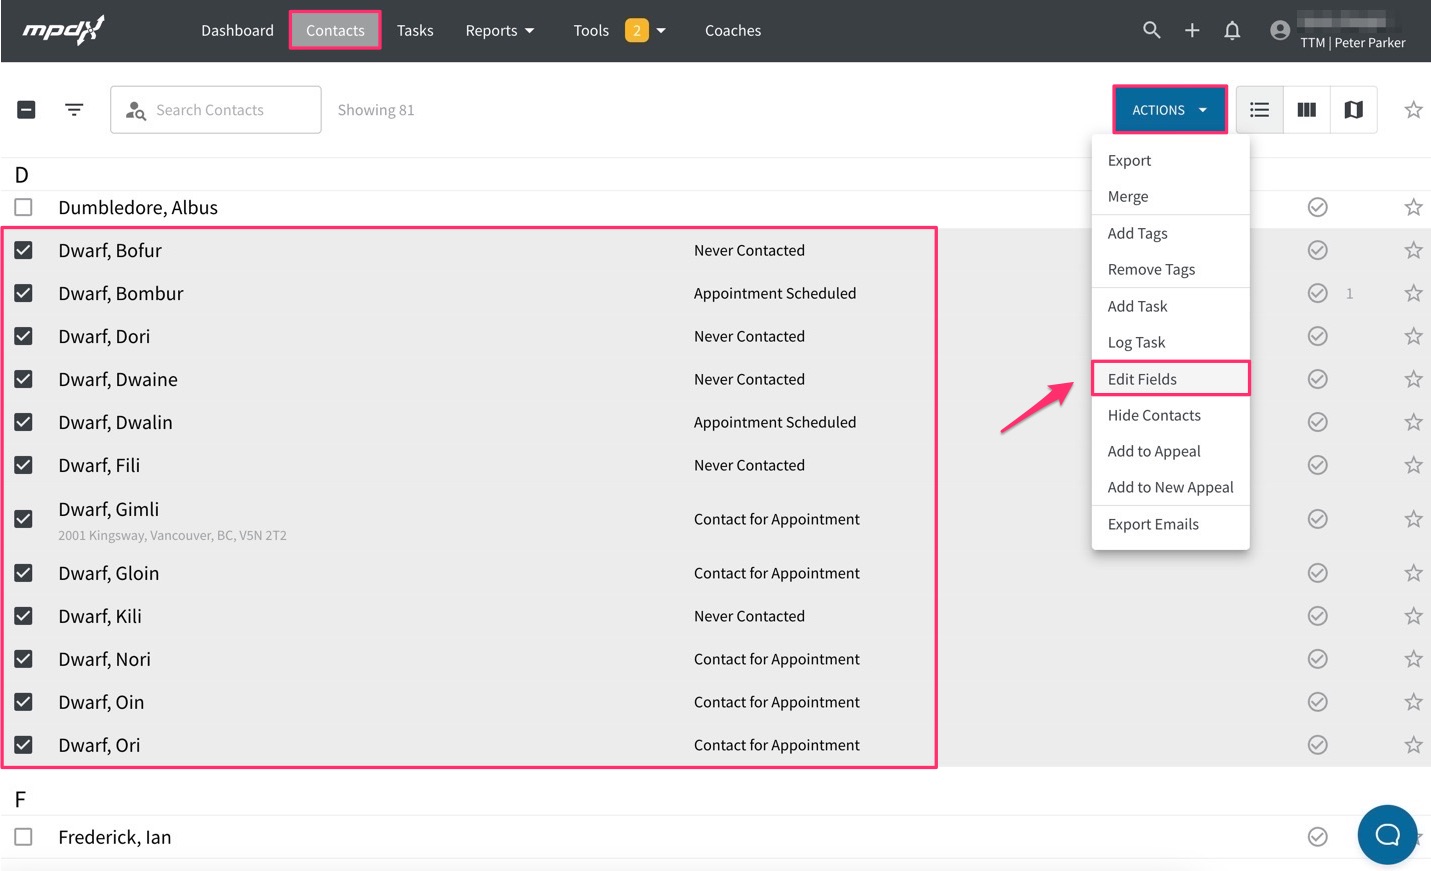
To set the Status for multiple contacts at one time: Go to the Contacts tab:
- You can set a status for multiple contacts at a time by selecting each contact from your list, then visiting “Edit Fields” under the Actions menu. Pick a “Status” from the dropdown menu and then “Save.”
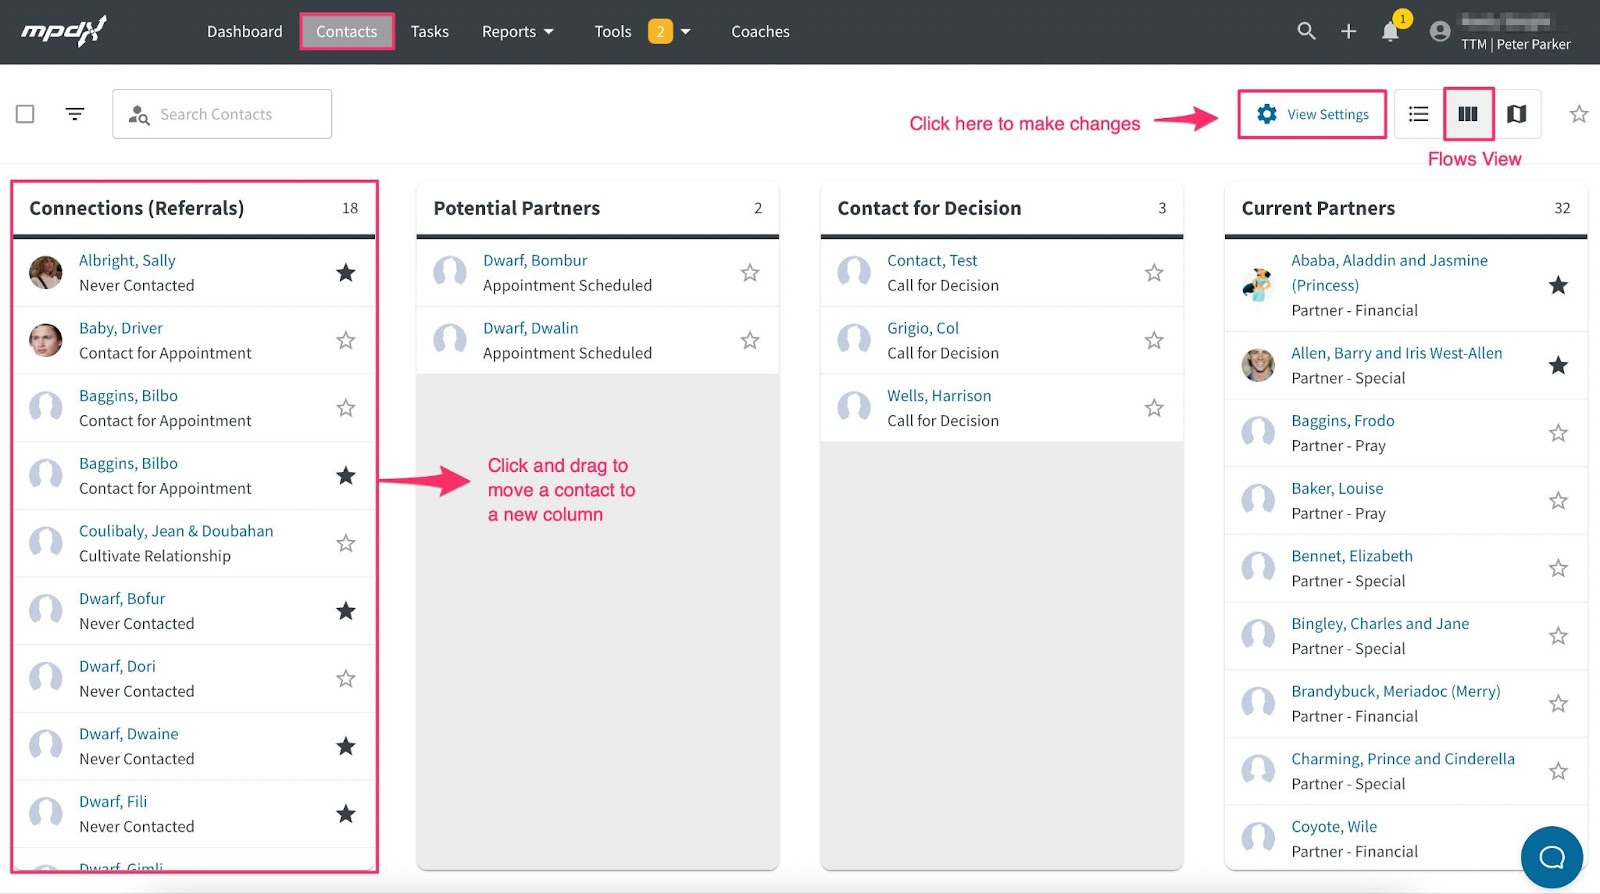
Having a status set for your contacts will be helpful for our next minimalistic tip: use the Contact Flows view as a way to see and set up connection steps with each Contact, or potential ministry partner.
Step Four: Use the Contacts Flows View
This view is helpful for creating a visual of your contacts by “Status” type and allows you to drag contacts from one phase of the MPD process to another phase very easily moving contacts through an MPD “workflow”
When you click a contact’s name and hold it in the Flows view, you can move their name between columns and through the MPD process. For example, let's say we texted Bofur and set up an Appointment. I can click and drag his name to the “Potential Partners” column to the “Appointment Scheduled” section. MPDX will generate an “Add Task” pop-up where I can add a task with the “Action” - “Appointment.”
Click the link to learn more about the Flows View.