Contacts: Lookup with Filters and Tags
Filters narrow down your contact list by specific criteria within MPDX. A single filter or a combination of filters can be used to display a specific list of contacts.
To find the Contacts Filters menu, go to the “Contacts” tab and click the icon to the left of the “Search Contacts” field. Hide the menu again by clicking the “x” in the top right corner.

Lookup with a Single Filter
When you add a Filter you will see the number of filters applied appear after the Filter menu title (i.e “Filter (1).” For this example, we searched by Contact Location, and filtered by the City Vancouver.

Lookup with Multiple Filters
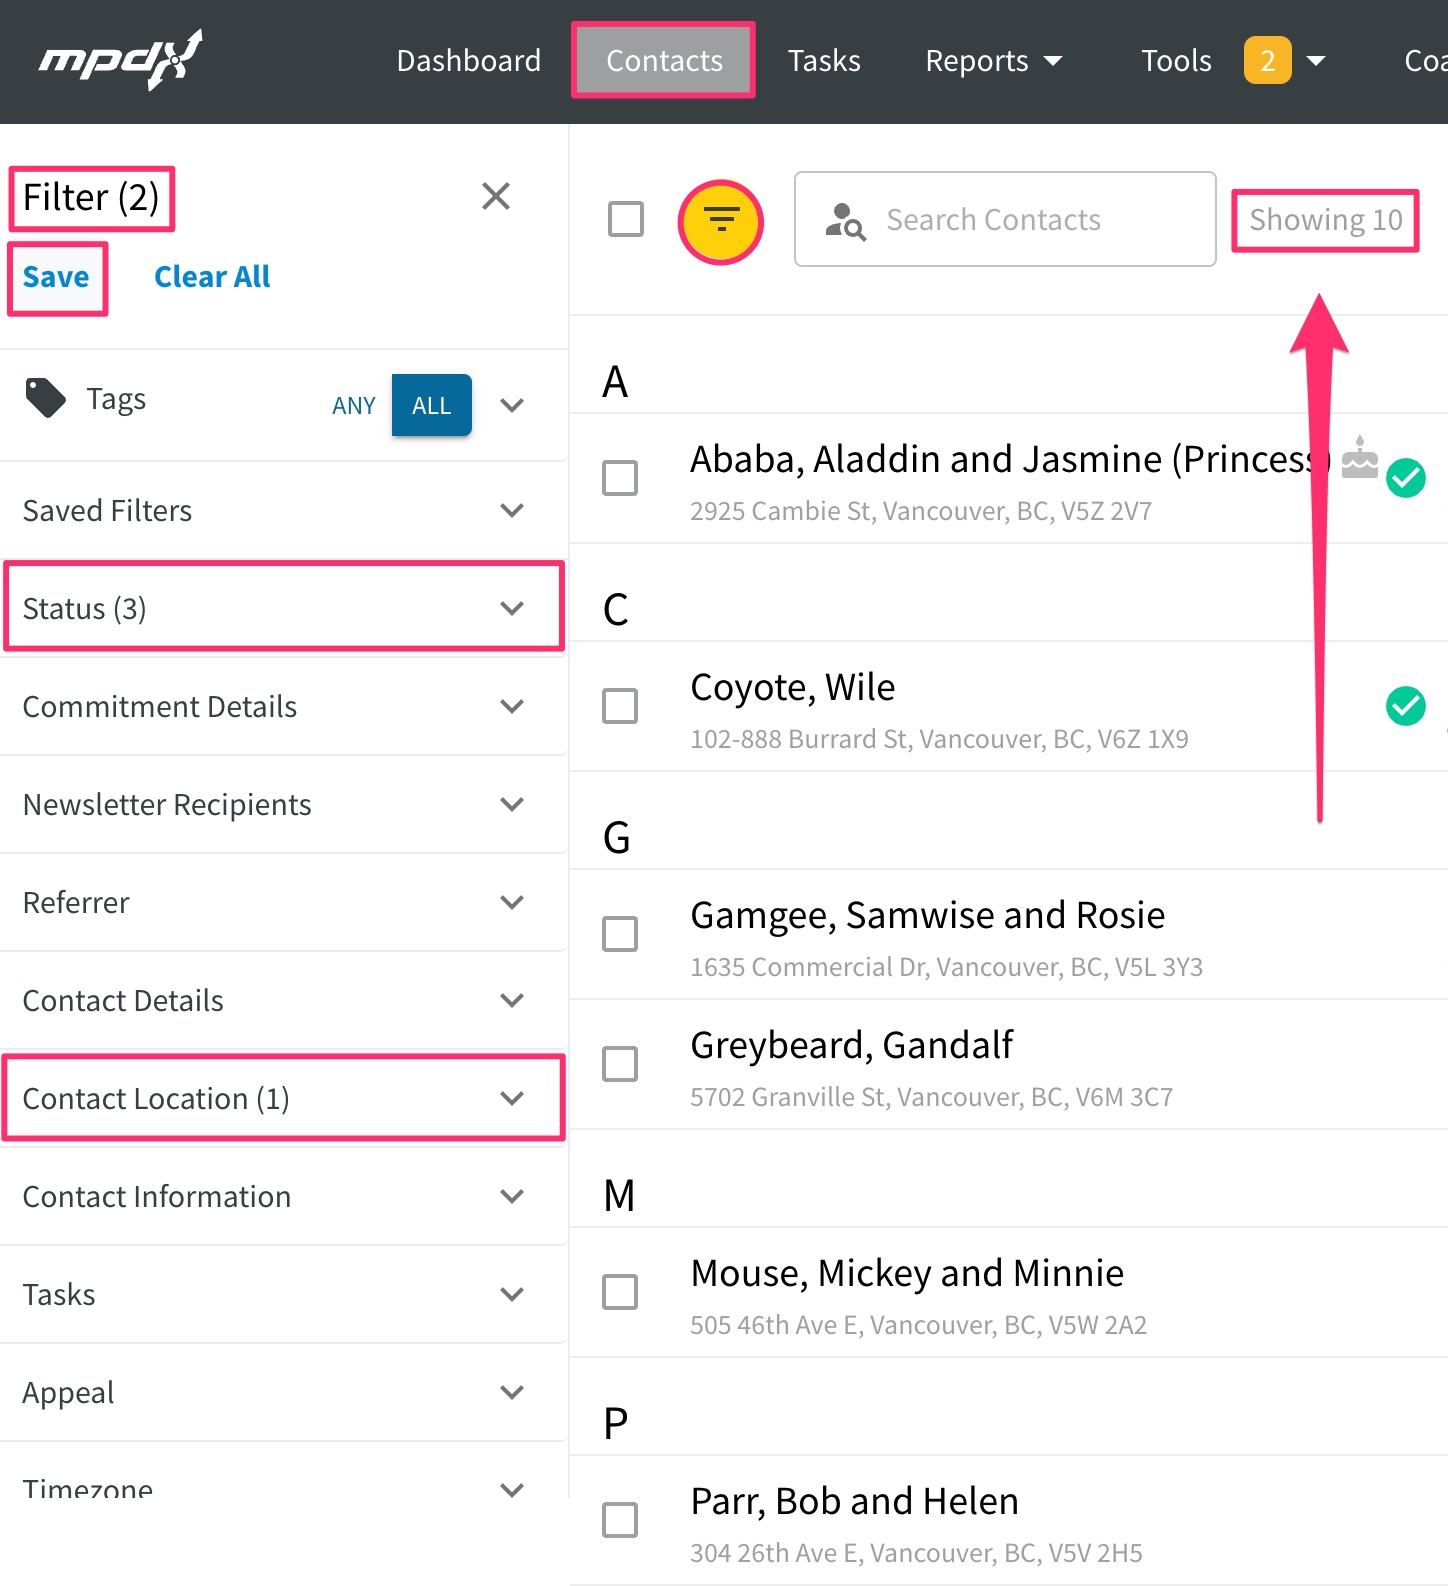
When you add multiple Filters you will see the number of filters increase after the Filter menu title i.e. “Filter (2)”. For this example, we searched by Status, and selected Partner - Financial. Then, under Commitment Details, chose Not Received from the Commitment Received list.

- When the filters menu icon is highlighted yellow it means that there are filters applied.
- Select “Clear All” to refresh your search and remove any filters currently set
Most Used Filters:
Tags
Tags are one way to narrow down your contact list within MPDX. A single tag or a combination of tags can be used to display a specific group of contacts.
To learn more about how to apply tags to Contacts, see the Tags for Contacts: Add, Remove, Delete, Edit article.
Lookup by a Single Tag
- Under Tags, click on a single tag (i.e. narnian royalty). Your list should show only contacts who have this tag.

Lookup by Reverse Tag
It can be helpful to search by “Reverse Filter.” For Tags, searching for all contacts who DO NOT have a tag can be of use. For instance, say you have created a “newsletter list” tag. A reverse search of this tag will pull up a list of all contacts in your MPDX that you HAVE NOT labeled with a Newsletter List tag.
- Under Tags, click on a single tag (i.e. newsletter list). Your list should show only contacts who have this tag.
- Click on this single tag again. It will turn from blue to red. Your list should now show only contacts who DO NOT have this tag.
- Click on this tag a third time to deselect this tag as a filter.

Lookup by Multiple Tags
- Choose multiple tags to further narrow your search.
- In the example below two tags are selected: “from vancouver” and “newsletter list.” All contacts listed (the example is “Showing 10”) meet both criteria.

Saved Filters
Once filters have been applied, you can save a particular search with multiple filters for future use.
- On the left, scroll up until you see the number of Filters Applied (i.e. Filter (2).
- Below the applied filters, click the Save button.
- Type in a Filter Name and click Save.

On the left, scroll down to the bottom to see the filter you just saved.
- It is located under Saved Filters (i.e. Vancouver Partners).

Status
An MPDX Status is used to track how your contacts progress through each MPD phase and how they will partner with you in your ministry.
This “Status” is set within A Contact’s Page in the topmost section. To edit an individual contact’s Status, click the pencil icon to the right of this top section and visit the “Status” dropdown menu at the top of the pop-up box.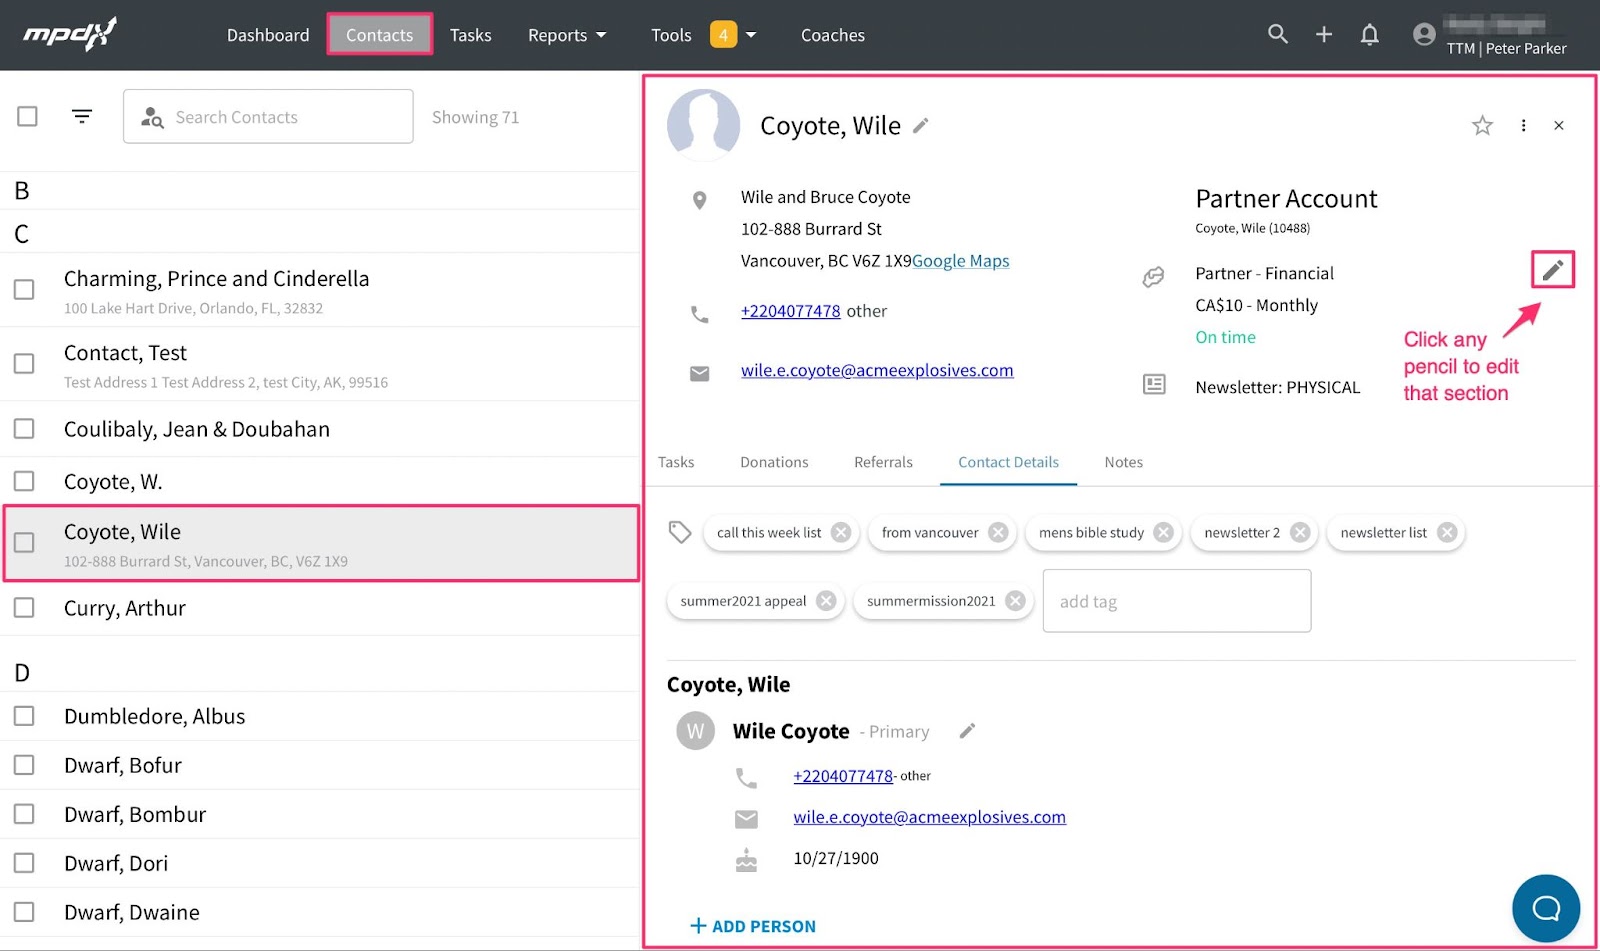
- “All Active” includes all Contacts with an "Active" status: Never Contacted, Ask in Future, Cultivate Relationship, Contact for Appointment, Appointment Scheduled, Call for Decision, Partner - Financial, Partner - Special, Partner - Prayer.
- “All Hidden” includes all Contacts with a "hidden" status: Not Interested, Unresponsive, Never Ask, Research Abandoned, Expired Referral.
- “None” includes all Contacts with no status entered.
You can use the “Reverse Filter” icon to select statuses who DO NOT have the selected status type (i.e. a list of all contacts who DO NOT have the status “Contact for Appointment”). When you are searching by reverse filter the filter will turn red. Click the arrows icon again to return to the non-reversed filter search.

Contact Location
A Contact’s Location is set within A Contact’s Page in the Contact Details tab of an individual contact. Scroll down to see the “Mailing” Section. To edit, click the pencil icon to the right of the “Primary” address.
When you use the Contact Location Filters, you can specify your search by “Address Type.” There are several address type options available to choose from:
- Primary Address: The address entered and listed for a contact that is marked “Primary” within that contact’s page
- Active Address: Any address listed in the system that is NOT marked “Address No Longer Valid”
- Inactive Address: Any address listed in the system that is marked “Address No Longer Valid”
- Any: Any address listed in the system.
- You can also filter by “City”, “State”, “Country”, “Metro Area”, or “Region”.
- The option exists to do a “Reverse Filter” search of each of the filter options. When selected MPDX will include all contacts who DO NOT have the selected filter.
Gift Details
A Contact’s Gift Details are determined by the donations received and recorded on A Contact’s Page in the Donations section.

When filtering using “Gift Details” there are several possibilities:
- Gift Options:
- Any
- No Gifts
- One or More Gifts
- First Gift, or Last Gift
- Exact Gift Amount: Choose a specific gift amount listed in the dropdown menu to find the contacts who have given that gift amount
- Gift Amount Range: Set a “min” or minimum, then “max” or maximum gift amount range to see a list of contacts who have given within the amount set
- Gift Date: Set a “Start Date” and “End Date” to see a list of contacts who have given a gift in this date range
- Begin by selecting a “Start Date.” You can click the pencil icon to type a date, or use the calendar option to page through months and choose a day, month and year.
- End by selecting an “End Date” using the same process as above.
- If you are having trouble, use the “Clear Filters” option to refresh your search
- For example, a filtered search with the “Start Date” of January 1 of the current year and “End Date” of the current day will pull up a list of contacts who have given so far this calendar year.
- Next Increase Ask: You can enter this date in the “Partnership Info” tab of the Donations tab. Click the pencil icon to edit. The filter will pull all Contacts with a next increase ask date within whatever date range is entered in the filter.
- Designation Account: Choose between ministry accounts. Pick one, multiple, or “Any” from the filter options.
“See More Filters”
- Click “See More Filters” to expand the filters menu beyond the most used filters.
- Click “See Fewer Filters” to return to the simplified list of the most used filters.