Maintaining Your MailChimp List
Because the sync of information between MailChimp and MPDX is only one-way, from MPDX to MailChimp, you need to update MPDX with changes. Here are some routine things you can do to keep your email list to ministry partners current.
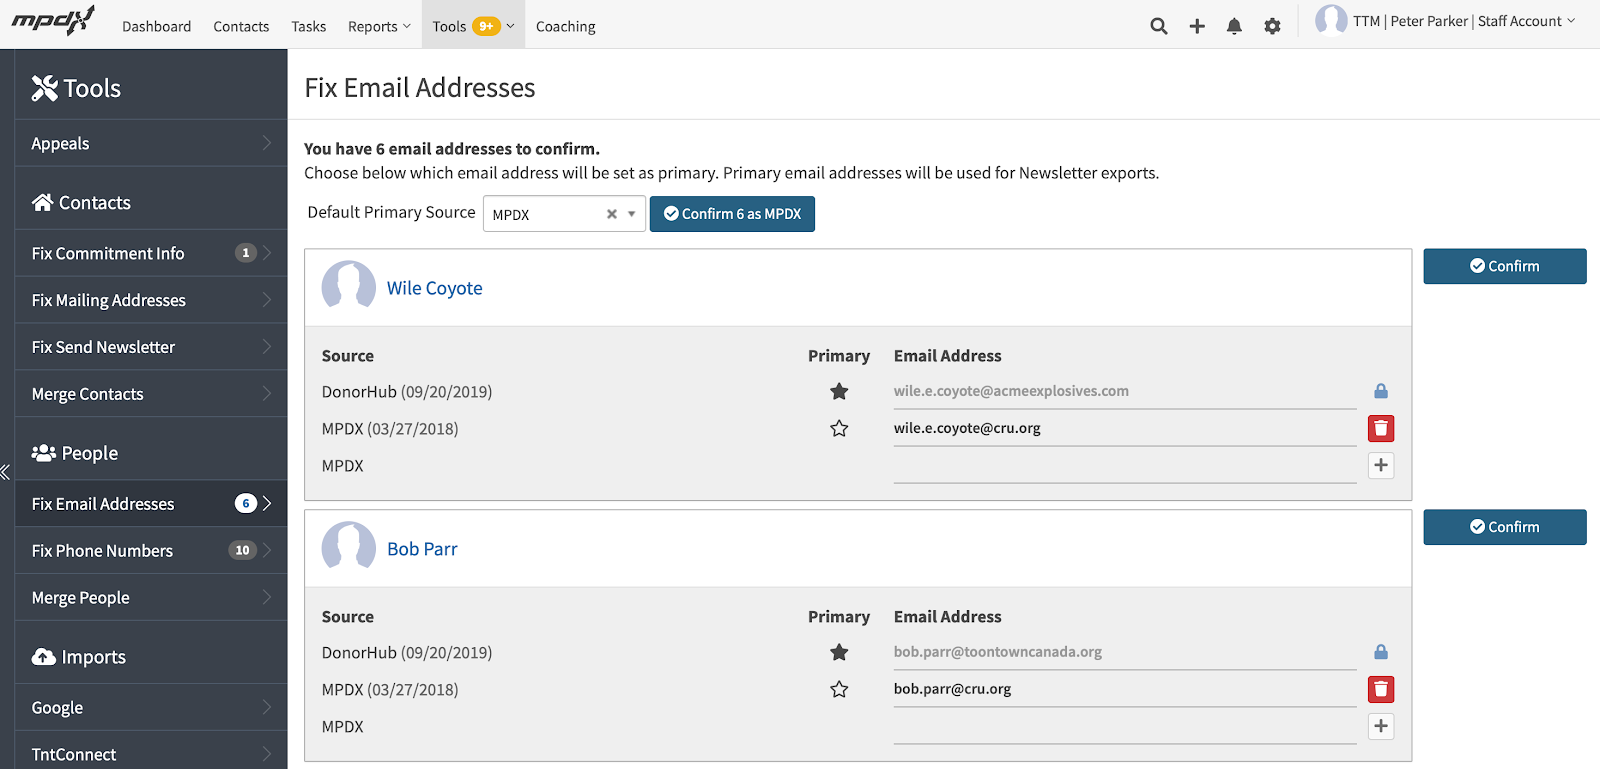
Check Tools for “Fix Email Addresses” Notifications
Look at the MPDX top Navigation bar under Tools for any "Fix Email Addresses" Notifications. Select and 'Confirm' which email address is correct (MPDX vs. Donation Services or DonorHub).

Update Your Contact in MPDX
If you need to update a Contact’s email address, make sure to do it in MPDX. If you update a Contact in MailChimp, that information will NOT sync back to MPDX. Additionally, if you add people in MailChimp, MPDX will NOT automatically create a new contact in MPDX. You will need to also create them manually in MPDX.
You can ‘Edit’ a Contact’s email address and mark an email address ‘Primary’ under the People tab.

If your MPDX contact has multiple people, each can be independently subscribed to receive MailChimp updates when an email address is entered and marked Primary.
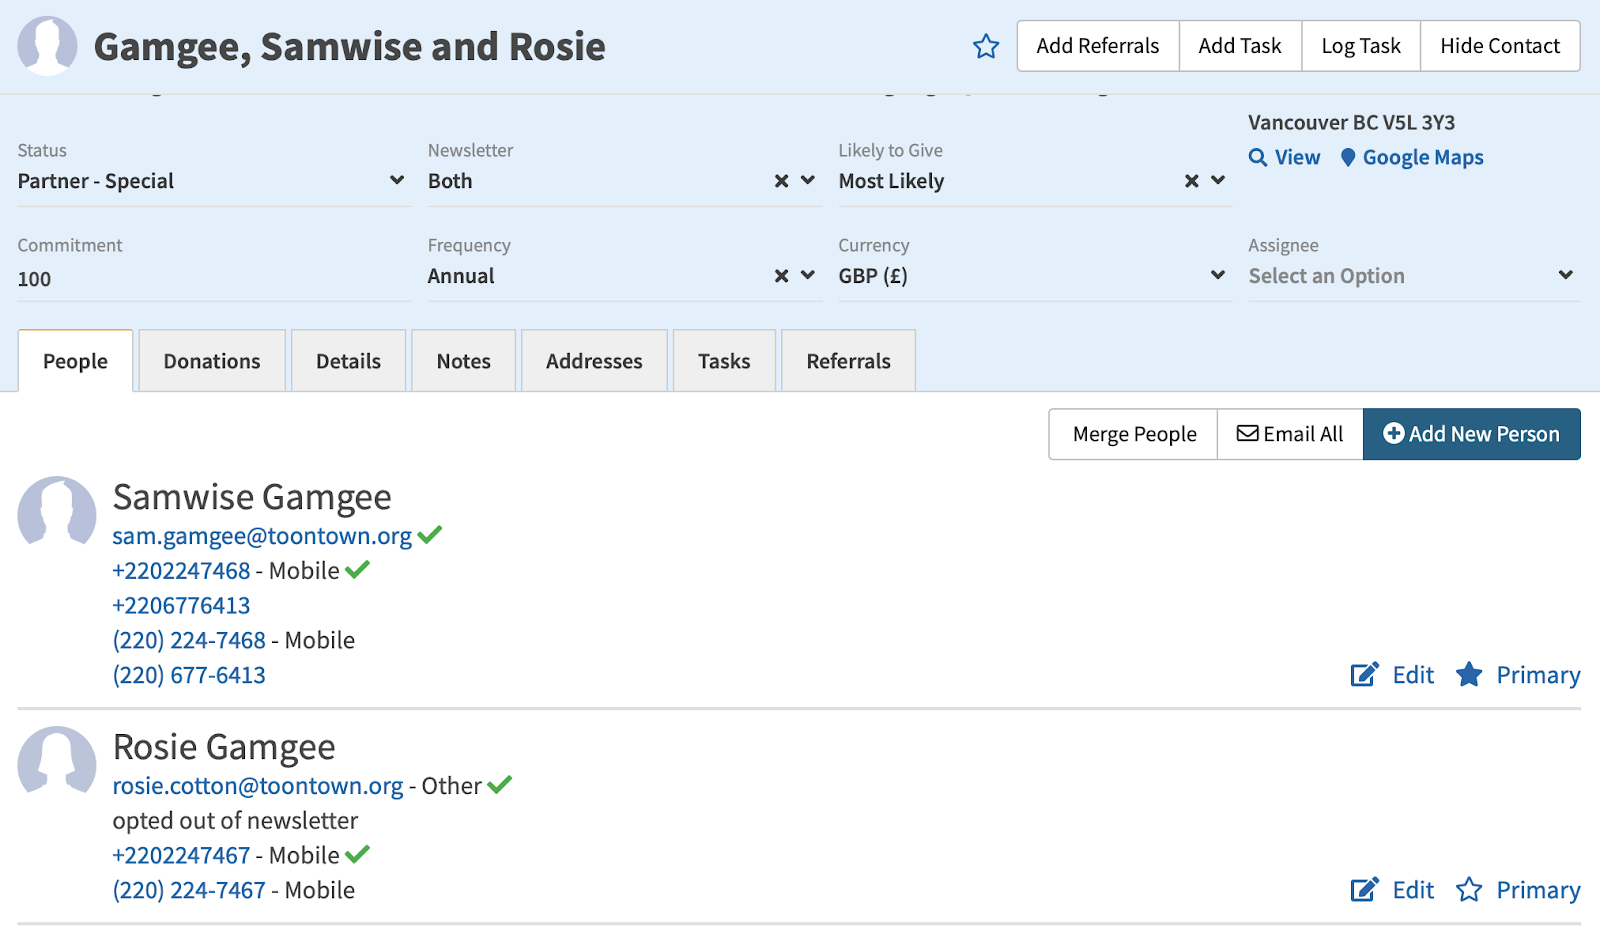
If one person within a contact does not wish to be included in the email list they can be marked “Opt Out of Newsletter.”

This is what happens in MailChimp when you make changes to a Contact within MPDX and have the sync with MailChimp turned on:

- Contacts who are set to receive “Newsletter - Email” or “Newsletter - Both” in MPDX will be placed on the MailChimp list. Changing the Newsletter preferences within a Contact in MPDX will update or remove a contact from the MailChimp list.
- Deleting a Contact in MPDX who was marked “Newsletter-Email” or “Newsletter-Both” (and therefore subscribed to your MailChimp list) will automatically unsubscribe this contact from MailChimp.
- Hiding a Contact in MPDX who was marked “Newsletter-Email” or “Newsletter-Both” will NOT automatically unsubscribe this contact from MailChimp. To unsubscribe the Contact, change the Newsletter preferences to “None” or check “Opt Out of Email Newsletter” within the person’s Contact card.
- If you change a Contact’s Newsletter status in MPDX from Email or Both to Physical or None, MPDX will mark all people within that contact as Unsubscribed by Admin in MailChimp. If this happens, MPDX will now add a note to the contact in MailChimp explaining why it was unsubscribed. For more information about where to find this note, please read this article. If this happens, go and check their newsletter status in MPDX to make sure it is email or both. Once you change it in MPDX, it should resubscribe them in MailChimp.
- If you accidentally unsubscribed a contact from your MailChimp list, or a contact who had formerly unsubscribed has changed their mind and wants to be resubscribed, you will need to uncheck the "Opt-out of Email Newsletter" box and click "Save" on that contact's page in MPDX. You will also need to visit MailChimp and follow their how-to process of how to Resubscribe a Contact. This process includes sending an email link from MailChimp that indicates their desire to be resubscribed to your email "Audience."
Look for Unsubscribes in MailChimp
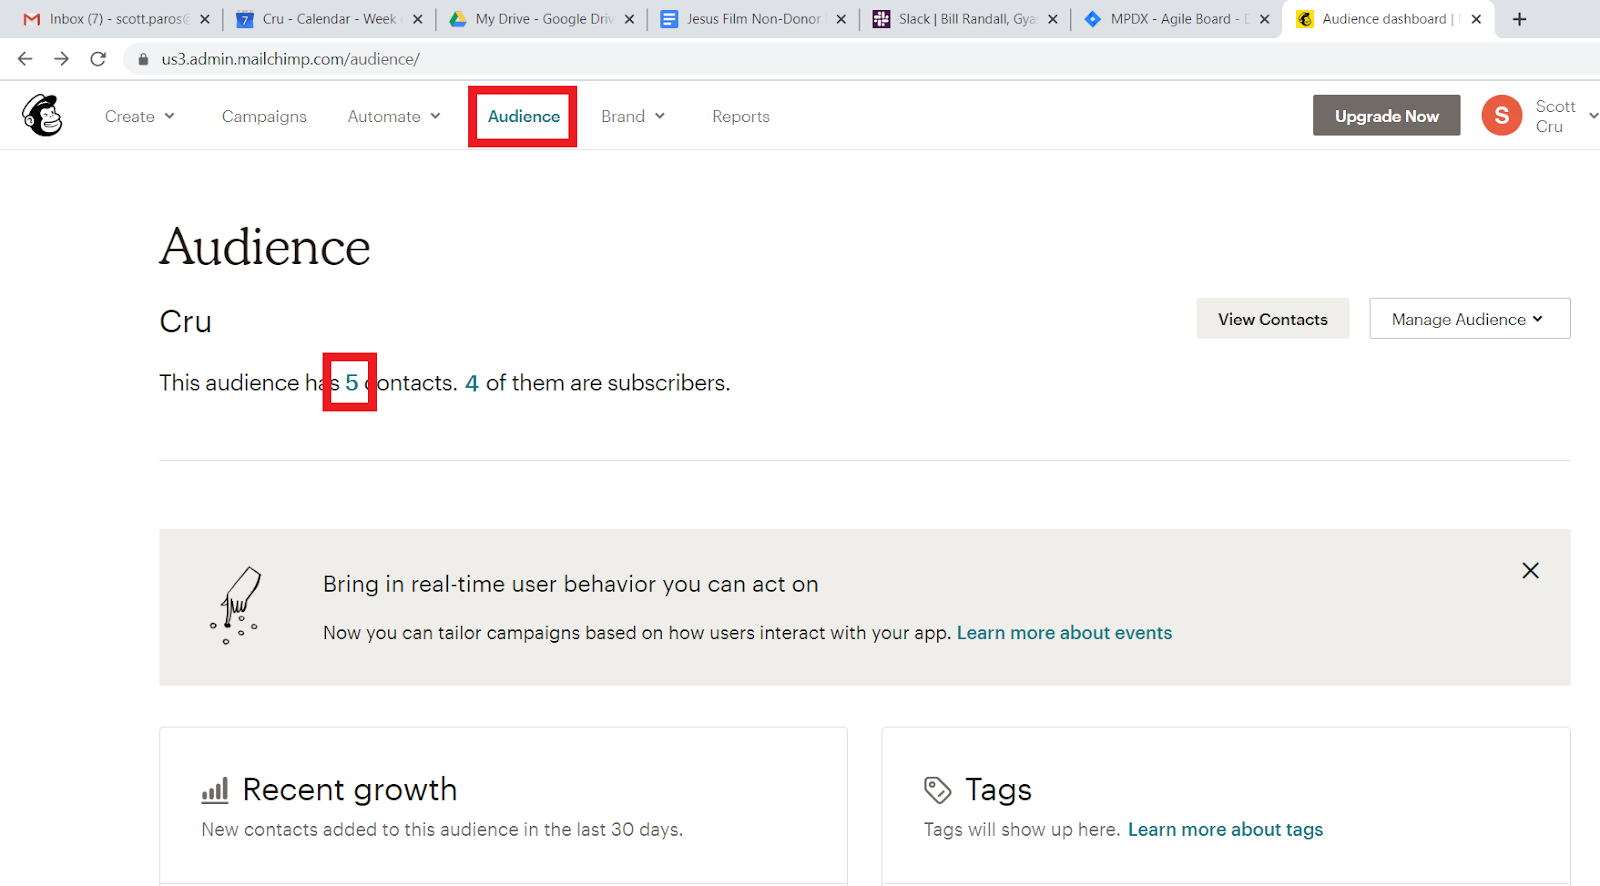
After logging into MailChimp, click on the Audience menu option at the top. Then click the hyperlink of the numbers of contacts you have in your audience. If you have and maintain multiple lists, make sure you are looking at the MailChimp Audience related to your prayer letter (or other ministry partner communications).
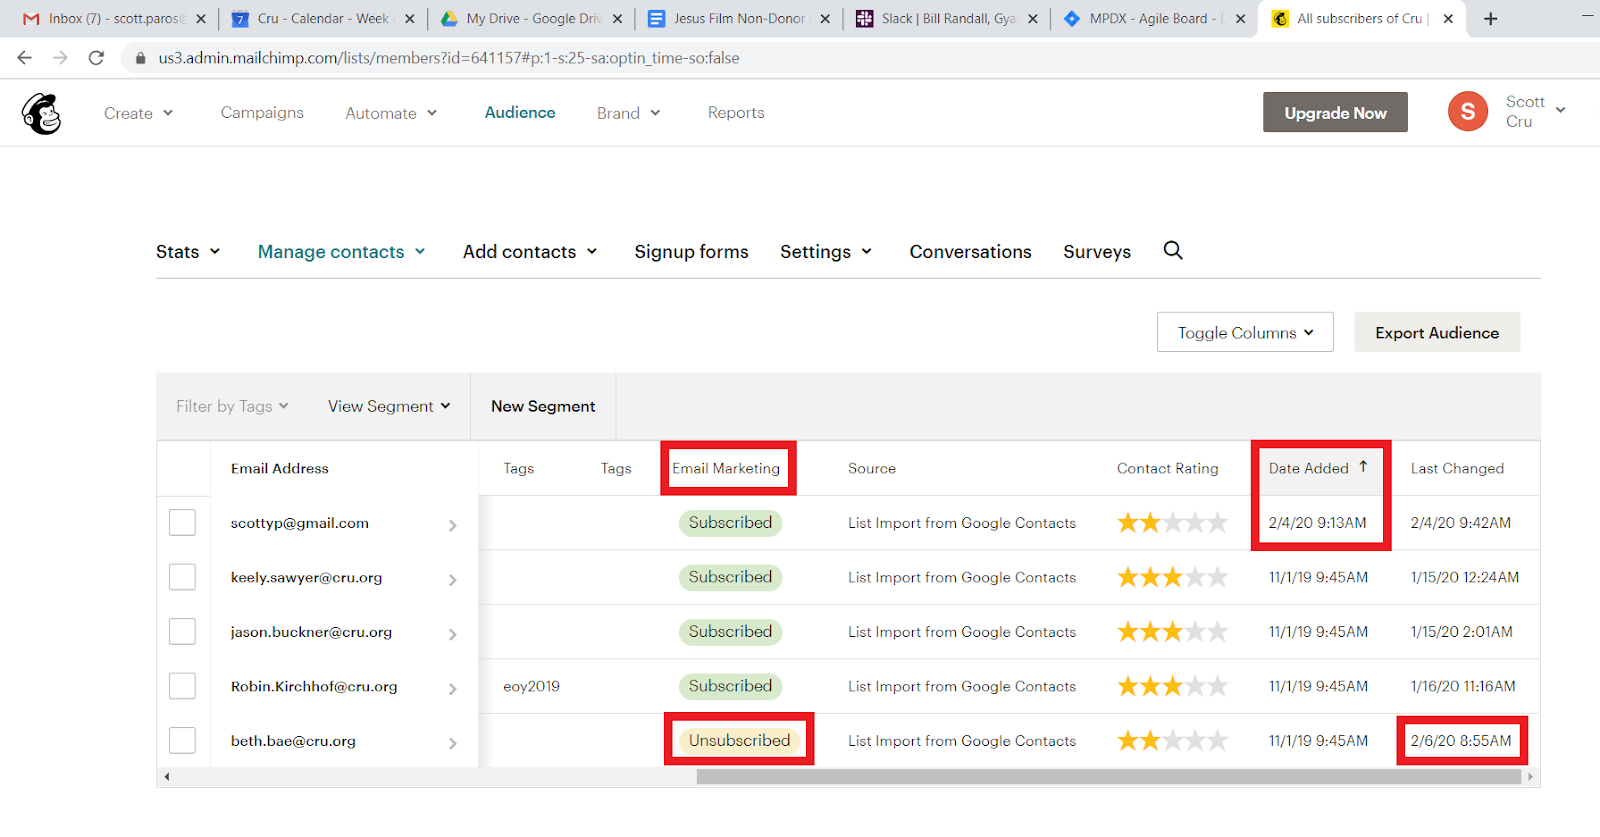
Here you can sort the ‘Email Marketing’ column to see who (and when) a partner unsubscribed from the email newsletter. You can also sort the ‘Created Date’ column to see updated (or brand new) email addresses.
Most changes in MailChimp will not show up in MPDX except in these cases:
- If a ministry partner unsubscribes through MailChimp and you have MailChimp notifications set up, MailChimp will email you. MPDX will also receive this information and mark the individual person as “Opt Out of Newsletter.” A spouse under the same contact with a subscribed email address will continue receiving the letter unless they also unsubscribe.
- If an email address is no longer valid, your newsletter will bounce and MailChimp will change the email address status to “cleaned.” MPDX will receive this information and will mark the email address as “invalid.” MPDX will also send you an email notification of this change and prompt you to update the email address.
- If you aren’t receiving notifications from MailChimp about unsubscribes or bounces, you may need to update your notification settings from their site.
Find and Cross-Check Your Email Lists
- Do a Filter search of your Contacts with the criteria: “Newsletter-Email and Both”
- Do a Filter search of your Contacts marked “Opt out of Email Newsletter” to see those who do not want to be included on your email updates list
- To do this, go to the Contacts Tab, and add the Filter under "Contact Information" > Opted Out of Email > "Yes, at least one person" from the dropdown.

- To do this, go to the Contacts Tab, and add the Filter under "Contact Information" > Opted Out of Email > "Yes, at least one person" from the dropdown.

Be aware that MPDX counts multiple people in a household as one Contact, but MailChimp counts each email address as a Contact. This means your Contact numbers may not match.
MailChimp and MPDX Tags
MPDX tags don't go to the place that Mailchimp calls tags. MPDX tags go into Mailchimp's Groups then subcategory of Tags.
To see MailChimp's Groups go to Audience > All Contacts > Manage Contacts > Groups
- You should see "Partner Status" and "Tags". These are the tags from MPDX. On far right of "Tags" choose "View Groups" and you will see your tags listed.
- You might want to count how many groups are in both "Partner Status" and "Tags" to make sure that you have less than 60. There might be as many as 15 in "Partner Status" which leaves about 45 for "Groups/Tags"
- If your count of "Partner Status" and "Tags" is over 60 then you have a problem with MPDX push to Mailchimp. No error is given for this situation.To fix the problem, you will need to do two things:
- First: Delete unneeded tags in MPDX to get yourself below 45.
- Second: Go to your list in MailChimp, click on Manage Contacts, then Groups. Click "View Groups" for Tags, then delete any tags you are no longer using. Once the total for "Partner Status" and "Tags" is under 60 then the system should fix itself.
MailChimp and Segmented Lists
To create a Segmented List of your contacts go to Audience > All Contacts > Manage Contacts > Segments
On far right, click "Create Segment" and select which contacts to add using the drop-down Groups / Tags. Then preview, select a name and save the segment.