Mapping Contacts
Mapping Contacts in MPDX
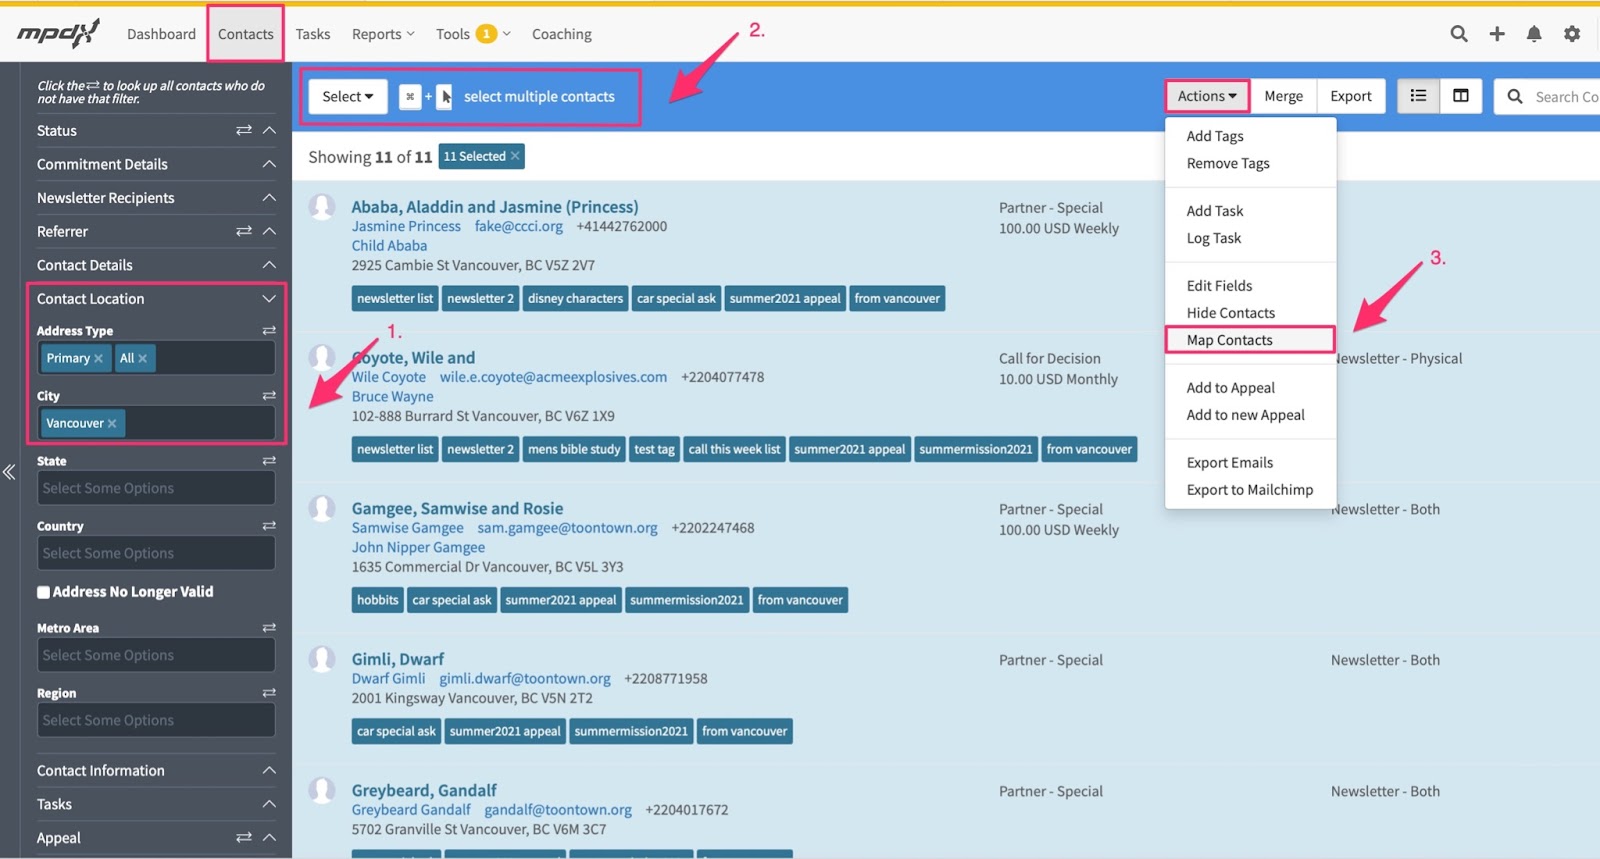
Step 1: If you visit the Contacts tab of MPDX and look along the left side of the screen you will see search Filters you can add to narrow the list of contacts you see.
Under the “Contact Location” section you can filter contacts by City, State, Country, Metro Area, and Region. Click on the field where you wish to type, type, then hit enter to add an area to your search. For this example, a city search of “Vancouver,” resulted in a list of 11 contacts.
Step 2: Select each individual desired from your list.
To do this you can:
- Select contacts individually by holding down the Command button and clicking each contact desired
- Select all contacts by choosing the Select dropdown menu
- Deselect a contact by holding down the Command button and clicking again to unmark a marked contact
Step 3: Under the Actions drop-down menu, choose the option “Map Contacts.”
Step 4: MPDX will provide a visual of each ministry partner and their location in the selected area.
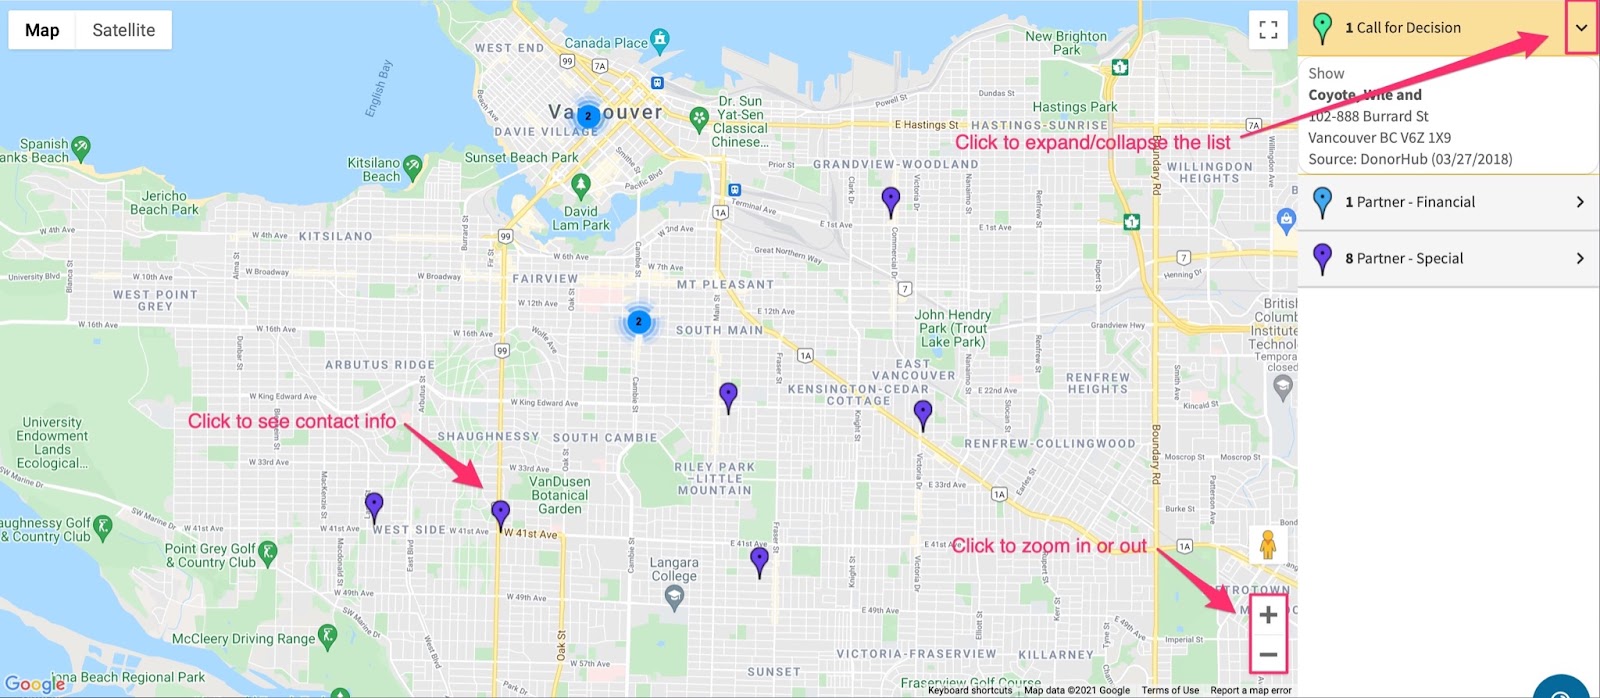
Different pin colors mark different Partner Statuses
- Green = Call for Decision
- Blue = Partner - Financial
- Purple = Partner - Special
The number that directly follows the pin is the number of contacts of that status type that is mapped in the given area.
Click to see the contact information associated with each pin
Click to expand/collapse the lists
Click to zoom in or out on the map view
Switch between Map and Satellite in the top left corner of the mapped contacts view to toggle between map styles.